
Lead generation in real estate investing encompasses many different strategies depending on what your business model is. Are you sending yellow letters in hopes of having distressed sellers call you on the phone during your wholesaling campaign? Are you trying to find qualified tenants to fill your rental properties? Or are you vetting multiple contractors in your area to make sure they are trusted to get the work done as written in your scope of work agreement?
Whatever types of leads you are trying to filter through, it can sometimes end up being a massive amount of data to collect depending on how good your marketing is. Lets assume your website is optimized for search engine indexing and you have 1000 visitors a day. Let’s also assume that your conversion rate for people to call a number on your site is 5%. (Yes that’s a little high to hope for, but stick with me!) You would have 50 leads to answer, email, take notes on, respond to social media questions, etc… That’s a lot of your time per day spent on simply collecting information and answering potential lead questions.
But We Love Big Data!
So how can we speed up this data collection process? Well, you may have heard of good ‘ole Google Docs and Google Sheets, which are themselves amazing tools for real estate investing and definitely a topic I’ll cover in another post in the future. However, you may not have heard of Google’s lesser known web application Google Forms! Google Forms is an incredible tool for collecting information for a variety of reasons on a massive scale. It integrates with Google Sheets by default, which allows you to analyze data like you normally would with an excel spreadsheet and all the powerful script editing tools that come with it.
I’ve noticed quite a few investors in my market are not taking advantage of this wonderful tool, while I use it every day in my investing business. So I thought I would go over a couple use cases and illustrate some of the neat capabilities it has in regards to real estate investing.
Take Hold of Your Leads
Below is an example form similar to the one I use in my rental business to automatically collect information about potential tenants:
As you might notice, the form is also embedded in my website. Do you see where I’m going with this yet? Let’s delve a little bit deeper into its functionality for my rental business. Remember my example from the beginning of this post with the 50 leads to attend to. If we assume these 50 leads are potential tenants that want to rent your property, each one of them will contact you via the traditional methods such as calling, emailing, messaging on social media, texting etc. Whatever types of communication paths you have setup in your business, they will no doubt be trying to get a hold of you. You may even be fielding all of these phone calls and responding to these emails as they come in. Well let me tell you right now, that if you have a full time job like me then it is going to be quite difficult to keep up with the amount of leads coming in. So setup a Google Form to handle all of your leads!
Automate Your Workflow
Instead of having all these leads trying to contact you through various communication avenues, simply provide them with a link to fill out the Google Form! This way, you won’t have to wade through leads that don’t meet your criteria or waste time simply contacting them. The link to the Google form can be sent via email as an auto response, or you can embed it on your website like above.
So now that your potential lead has filled out the form, where exactly does this data go? Well, Google has been so kind to integrate Forms with Sheets, which as I hinted at earlier, is just another spreadsheet web application. This makes it incredibly easy to analyze your form submissions. In fact, Google has added an analysis page in their new Forms update so you can see the analysis before even navigating to the spreadsheet. Below is an example of some dummy data I entered for this example:
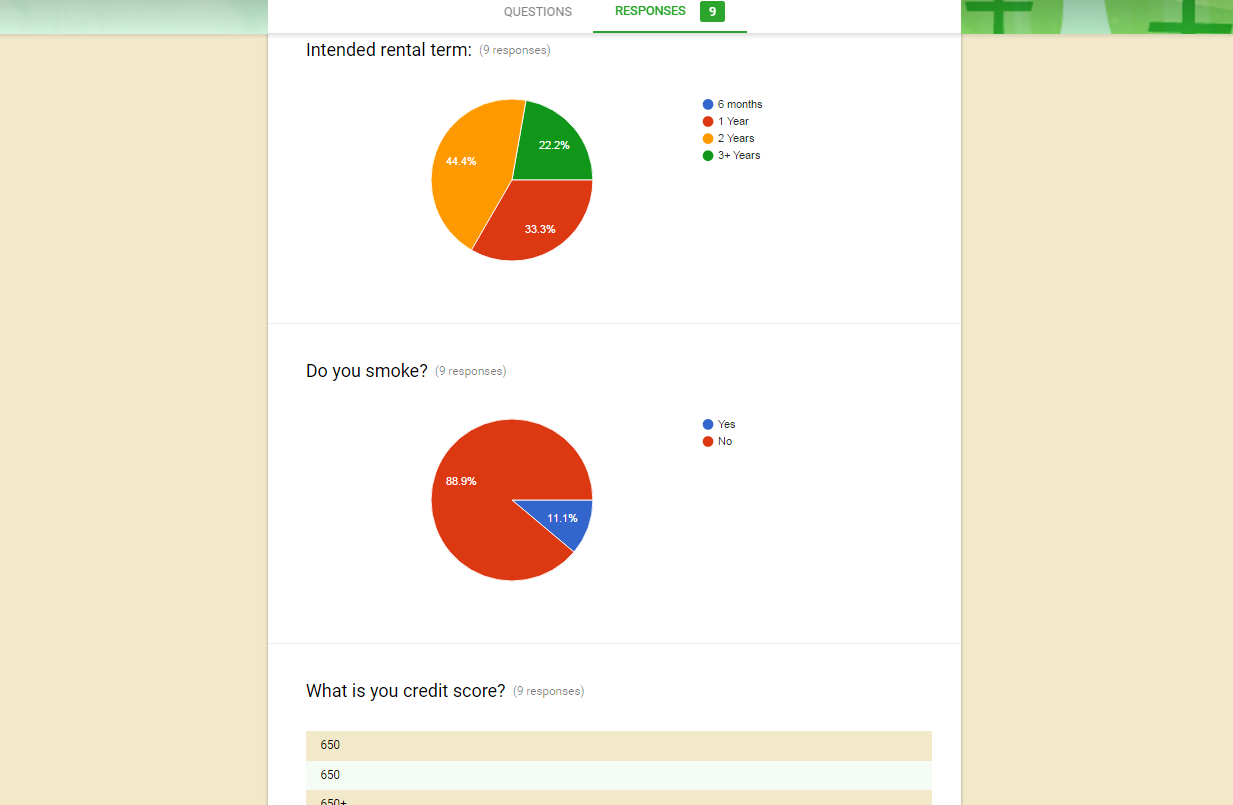
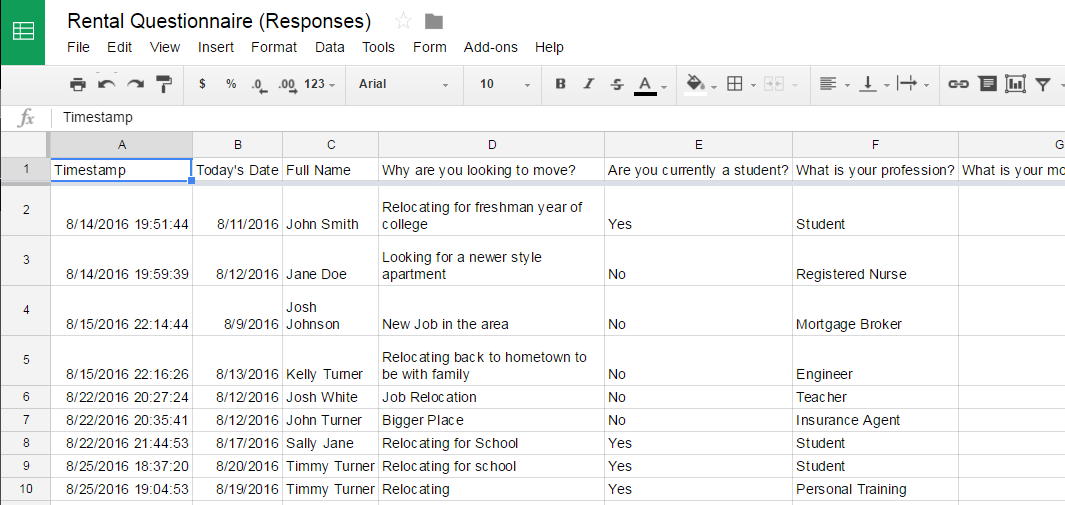
As you can see, the responses analysis view of the form gives you a sleek breakdown with easy to view tables and graphs. In this examples, I have a few submissions where the potential leads chose how long they wanted their rental term to be and whether or not they smoke (preference is no!). If you want to view the responses in the spreadsheet view, you can simply go to Google Sheets from your Google Account and it will list the responses as a new spreadsheet file. This where you can do some seriously powerful analysis if you have hundreds or even thousands of leads, automatically filtering out the ones you care about and those you don’t:
Code Makes Everything Better
To sum up this post, I wanted to show you guys how Google Forms becomes an absolute monster of a web application. Google has provided us with a script editor for Forms which allows you to essentially program how your form and submitted data interacts with with other web applications online. Do you want to send your data to a nicely formatted pdf for the tenant relations lead? Do you want to integrate your data with a mass mailing service like Mailchimp? Or do you want to simply get notified when someone fills out your form with certain criteria? There are infinite possibilities given the development environment provided. Here is the step-by-step process in setting up your form to notify you via Gmail in a more visually appealing format. (Note: This assumes you have already setup a lead generation form):
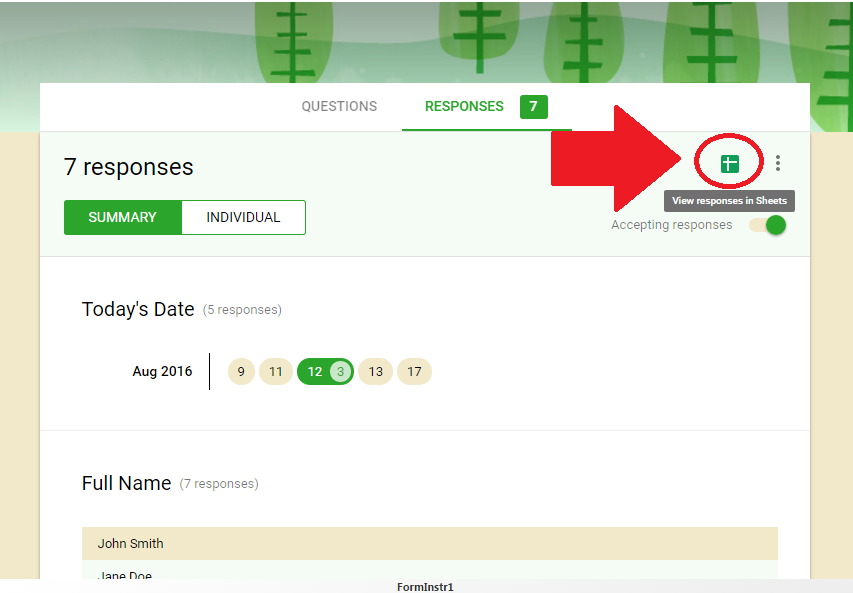
1. Open the Responses Sheet
Every Google Form you create will automatically generate a Responses Google Sheet to go with it. This sheet will collect the submissions of your form automatically. You want to click on the responses tab of the form if not on it already. Then click on the green square in the upper right:
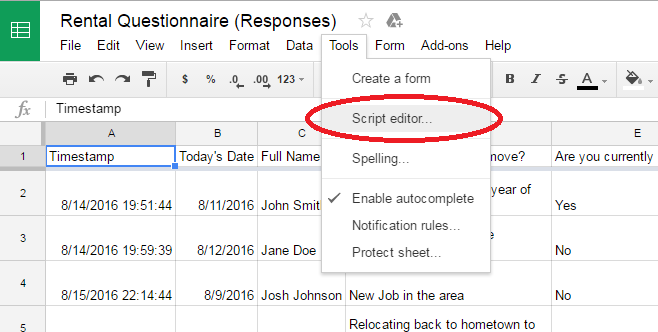
2. Open the Script Editor
3. Initialize & SendGoogleForm functions
Replace all of the existing lines of code with the following code:
function Initialize() {

 var triggers = ScriptApp.getProjectTriggers();

 for (var i in triggers)
     ScriptApp.deleteTrigger(triggers[i]);

 ScriptApp.newTrigger("SendGoogleForm")
     .forSpreadsheet(SpreadsheetApp.getActiveSpreadsheet())
     .onFormSubmit().create();
}

function SendGoogleForm(e) {

 if (MailApp.getRemainingDailyQuota() < 1) return;

 // REPLACE THIS WITH YOUR OWN EMAIL ADDRESS
 var email = "YOUR EMAIL ADDRESS HERE";

 // Enter your subject for Google Form email notifications
 var subject = "Google Form Submitted";

 var s = SpreadsheetApp.getActiveSheet();
 var columns = s.getRange(1, 1, 1, s.getLastColumn()).getValues()[0];
 var message = "";

 // Only include form fields that are not blank
 for (var keys in columns) {
     var key = columns[keys];
     if (e.namedValues[key] && (e.namedValues[key] !== "")) {
         message += key + ' ==> ' + e.namedValues[key] + "\n\n";
     }
  }

 MailApp.sendEmail(email, subject, message);
}
Essentially what this snippet of code does is twofold. It sets up the spreadsheet so that it can be triggered when a new line is added from our Google Form. Then it declares numerous variables like the Email address, subject of the email, how many columns you want it to send, etc…
What is important is that you change the email address variable to your own email, or wherever you want to send the new lead submission.
4. Setup Triggers
Head over to the “Resources” tab at the top of our sheet and select “Current project’s Triggers”. You will have no triggers set up yet so click the link to add a new one. You will see the following menu: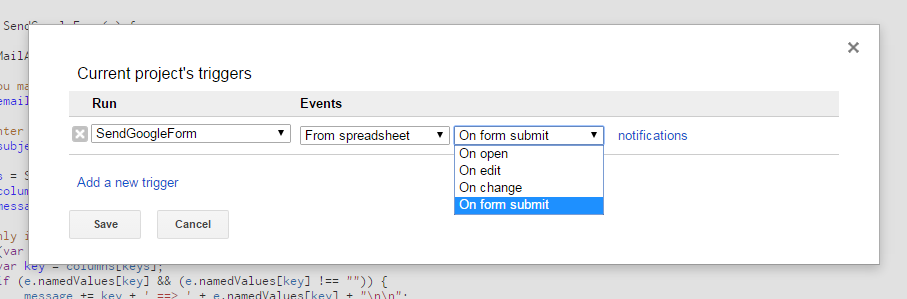
Select the appropriate Run and Event options from the drop downs which are shown above. The logic is this: You want to Run the SendGoogleForm function when the event”On form submit” happens and a new line is pulled “From spreadsheet”. Click save. The script editor will most likely prompt you asking for you to Review Permissions since it is accessing your Google Drive. Click Review Permissions” and then “Allow” on the next prompt.
Make sure to give your new project script a name in the top left. It can be anything you’d like. I made mine “Send_Email” for this example.
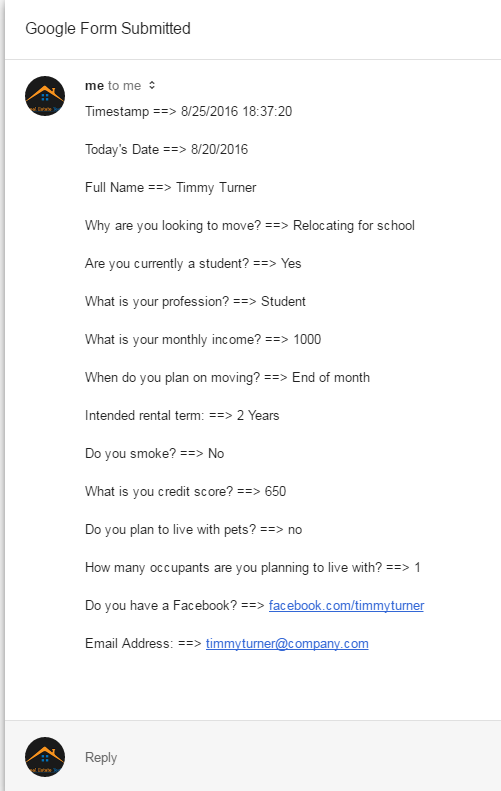
5. Send Yourself a Test Email!
At this point you are now good to go with your new lead automation emailer! Fill out your custom form as if you were a prospective lead. You will receive a nicely formatted email with all of the info that was filled out in the form! Example below:
If you had trouble with any of the steps, check out my full video below for a complete guide!